If your Windows 11 PC is running slow, then it is high time that you Clear RAM on your PC. RAM (Random Access Memory) – this is your computer’s temporary storage space which is used to manage your applications and ensure multitasking. However, it is bad news for your system when RAM is fully loaded with the need for extra allowance sometimes degrading the performance of your system. Clearing the RAM coupled with freeing space work as an essential component of a system called ‘PC upkeep’ that enhances the velocity of your machine.
What is RAM, and Why Is It Important?
RAM, or Random Access Memory, allows the computer to store data directly in a random order. It is important because it stores the data users are currently working on within the computer.
RAM can be thought of as your computer’s working memory as it temporarily stores data that are frequently accessed by the CPU. More RAM means that the system can run many applications more efficiently at once. However, if RAM is fully utilized, it slows down the PC’s performance, leading to lagging among other problems. A person can either increase the amount of RAM on the PC or in a worse case empty it constantly to ensure that the PC runs smoothly.
Signs You Need to Clear RAM
- Error Messages: If you receive “Low Memory” warnings, it’s time to clear your RAM.
- Sluggish Performance: Noticeable delays in system response often indicate overloaded RAM.
- Software Crashes: You can mitigate frequent application crashes by resetting your RAM.
- High CPU Usage: If your CPU is working hard even for simple tasks, clearing RAM can reduce its load.
- Troubleshooting: Clearing RAM is often the first step in resolving performance issues.
How to Check and Clear RAM Cache on Windows 11
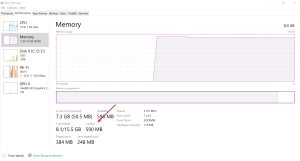
To check your RAM cache, open the Task Manager (Windows Key + X > Task Manager > Performance > Memory). If your cache is high, consider these methods to clear it:
- Restart Your Computer: This simple method clears the RAM cache and gives your system a fresh start.
- Use RAMMap: Download and run RAMMap to analyze and clear specific RAM cache areas.
- Delete Temporary Files: Use the Run dialog (Win + R, type
%temp%, and delete files) to clear unnecessary data. - End Processes in Task Manager: Stop resource-heavy processes to free up RAM.
- Disable Startup Programs: Prevent non-essential apps from consuming RAM by disabling them at startup (Ctrl + Shift + Esc > Startup).
- Uninstall Unused Apps: Remove apps you no longer use to free up more RAM.
For a more in-depth guide, check out our detailed article on Tips and Tricks and other system optimization techniques. If you want to boost your PC’s performance, check out these methods to clear RAM on Windows 10.
By keeping your RAM clear, you can ensure your Windows 11 PC remains fast and responsive, ready to handle any task you throw its way.
